
Home → Real Estate Edition Features → Websites for Realtors → Creating & Managing Custom Pages
6.6. Creating & Managing Custom Pages
Updated 06.17.16
Following are easy instructions for using our built-in web editing tools to create Custom Pages. If doing extensive work in Custom Pages or editing your page, please SAVE often (see Step 8 Below)!!
1. From the Real Estate Tools tab, click Agent Website from the sub-menu
2. Click Custom Pages from the options on the left (or click the name of the Custom Page you
wish to edit)
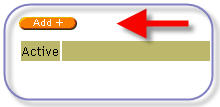
3. If creating a new Custom Page, click the orange Add+ button
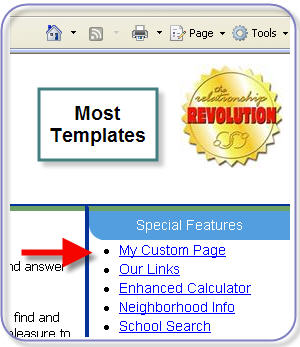
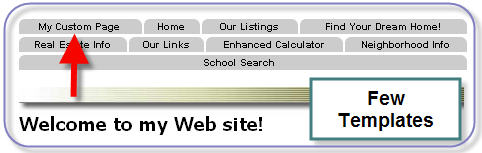
Depending on the website template you have chosen, new Custom Pages will either appear as
a link in the Personal Features section of your website (most templates) or as an actual page
accessed through a tab (few templates):
4. In the Tab Name field, enter the desired name for your web page link

5. Click the ACTIVE box if you want your page to be active on your web site. You can inactivate
pages without deleting them (for example, you may have seasonal messages that you want to
display only at certain times of the year)
6. In the editing box, enter the text and any graphics you like for your web page.
7. Be sure to click Save Changes at the bottom of the page to save your work!
Adding Images to Custom Pages
Here are guidelines for uploading photos into the custom web pages:
A. .JPG format works the best with our system; however you may also upload a .GIF
B. Make sure your photos are named correctly (name.jpg or name.gif). If they are not named
properly (two dots, no extension, duplicate names, etc.) our system cannot pull the image
C. Optimum DPI between 72 and 300 (we display 72 DPI -- most web browsers do not usually
see greater than 90 dpi). If you are trying to upload a very large or very small photo,
distortions including pixelization, fuzziness and/or blurriness may occur due to resizing by
our system. You may want to augment your photo through Photoshop or an equivalent
program prior to upload for optimum results.
1. Open the editing box for the page you wish to modify
2. Insert your cursor in the exact location you would like to insert an image
3. Click the Insert Photo icon.

4. The Image - Webpage dialogue box will open. Click the Folder icon adjacent to the Source field
to browse for your image

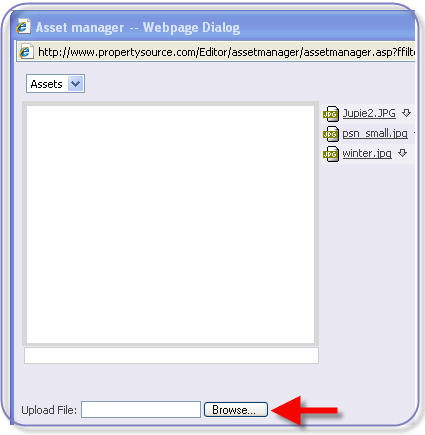
5. The Asset Manager - Webpage dialogue box will open. To insert a photo that already exists in your
Assets menu, skip to Step 7. To browse for a new image, click the Browse button to browse for
your image
6. Double-cllick the thumbnail of the image, or click to select the image, then click Open. The Asset
Manager Webpage dialogue box will be re-activated. Click Upload to add the photo to your Assets
library
The Custom Pages feature allows you to create unlimited pages for your Real Estate website, or to customize the following pages:
Welcome Page
About Me
Testimonials
Real Estate Info
Another option available to you is to create .html through Dreamweaver, Frontpage, Flash, or other third-party web design program, then paste into your custom pages via the View/Edit Source Icon: <> in the top horizontal menu bar. Unfortunately, providing instructions on writing code is not within the scope of services we provide.
Custom Pages appear in the Special Features section of your web site, in descending order by create time and date, with the most recently created links appearing at the top of the list. To manage the order of your Special Features links:
- Copy the contents of each link using the HTML editor tool ( "<>" on the top row, far right of your editing tools) and paste each into a Notepad (.txt) document.
- Name each document appropriately and save onto your desktop or in a convenient location.
- Then remove the existing pages, and
- Re-create them in ascending order (bottom link first, and so on) by Adding new pages and pasting your copied HTML. Make sure to use the HTML editor tool when pasting your HTML, or your pages will appear as code to your web visitors.
- Test each link thoroughly on your live web site to be sure it looks and acts the way you want it before deleting your HTML documents.
Following are easy instructions for using our built-in web editing tools to create Custom Pages. If doing extensive work in Custom Pages or editing your page, please SAVE often (see Step 8 Below)!!
1. From the Real Estate Tools tab, click Agent Website from the sub-menu
2. Click Custom Pages from the options on the left (or click the name of the Custom Page you
wish to edit)
3. If creating a new Custom Page, click the orange Add+ button
Depending on the website template you have chosen, new Custom Pages will either appear as
a link in the Personal Features section of your website (most templates) or as an actual page
accessed through a tab (few templates):
4. In the Tab Name field, enter the desired name for your web page link
5. Click the ACTIVE box if you want your page to be active on your web site. You can inactivate
pages without deleting them (for example, you may have seasonal messages that you want to
display only at certain times of the year)
6. In the editing box, enter the text and any graphics you like for your web page.
7. Be sure to click Save Changes at the bottom of the page to save your work!
Adding Images to Custom Pages
Here are guidelines for uploading photos into the custom web pages:
A. .JPG format works the best with our system; however you may also upload a .GIF
B. Make sure your photos are named correctly (name.jpg or name.gif). If they are not named
properly (two dots, no extension, duplicate names, etc.) our system cannot pull the image
C. Optimum DPI between 72 and 300 (we display 72 DPI -- most web browsers do not usually
see greater than 90 dpi). If you are trying to upload a very large or very small photo,
distortions including pixelization, fuzziness and/or blurriness may occur due to resizing by
our system. You may want to augment your photo through Photoshop or an equivalent
program prior to upload for optimum results.
1. Open the editing box for the page you wish to modify
2. Insert your cursor in the exact location you would like to insert an image
3. Click the Insert Photo icon.
4. The Image - Webpage dialogue box will open. Click the Folder icon adjacent to the Source field
to browse for your image
5. The Asset Manager - Webpage dialogue box will open. To insert a photo that already exists in your
Assets menu, skip to Step 7. To browse for a new image, click the Browse button to browse for
your image
6. Double-cllick the thumbnail of the image, or click to select the image, then click Open. The Asset
Manager Webpage dialogue box will be re-activated. Click Upload to add the photo to your Assets
library
7. Click the filename of the image you wish to upload. A thumbnail preview will appear.
Click OK
8. The Image - Webpage dialogue box will be activated. Enter a brief title for your photo in the
Title field. Choose an Alignment option from the dropdown menu (default is absolute left).
If you want clear space around your photo, use the Spacing section (default is no spacing).
The display box will give you an indication of how your photo will look in relation to your image.
Click Insert to finish the insertion
This page was: Helpful |
Not Helpful